
Trough & Container Management
Foreword
Meant are the Mietmulden & container in circulation. They are placed by the customer and picked up later.
Wello Container Management has the following goals:
- Where are all troughs / containers currently located – visualised as a GEO Map?
- Easy handling for the driver
- Self-correcting mechanism, should the trough not be properly captured.
- Automatic recognition of whether the tours deliver or pick up troughs / containers
- Automatic creation of positions in the tours for transportation.
- Automatic booking in Wello Warehouse Management
Generalization
The Container Management can be applied to any equipment being transported, even weighing materials such as earth, rubble and the like.
If weight materials are maintained with the tours, later statistics can be executed, eg. B. how often from which place a material is transported. Bills can be created from the tours.
Base data
The container management itself is part of the Wello Warehouse Management.
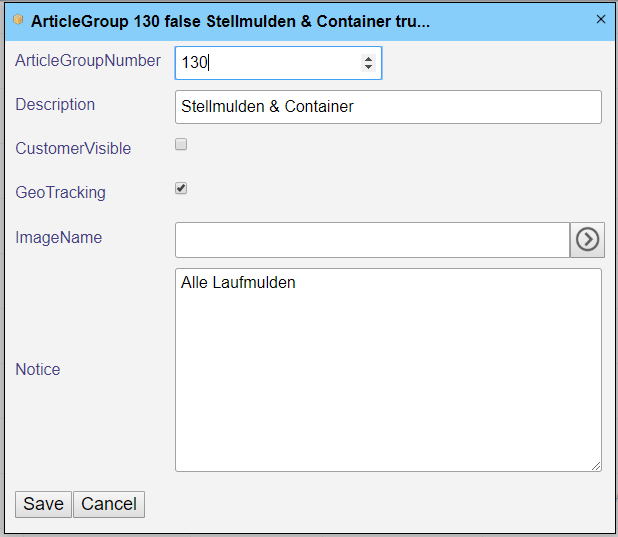
All troughs/containers are added as articles in the article list, subordinated to an article group with the number 130.
Product group
All troughs and containers must be subordinate to an article group numbered 130.
The flag GEO Tracking indicates that the articles are to be provided with GEO data so that they can later be displayed on a world map.
Article Management
Since the troughs and containers are individuals, they must all be registered individually in the article lists.
Each trough or container must have a unique number. Here we recommend a four-digit number for the troughs starting with 1000. This simplifies the typing in of the transported containers for the driver and with four digits they can be clearly listed in find tools.
The assigned numbers must logically be written down at each trough. This can be printed with a spray can or a sturdy shield is attached to the number on the trough or container.
The troughs and containers can also be scaned via barcodes or QR codes. The corresponding ID must be entered in the barcode field of the container. The reading out of an attached RFID chip is supported as far as your mobile phone is RFID-enabled.
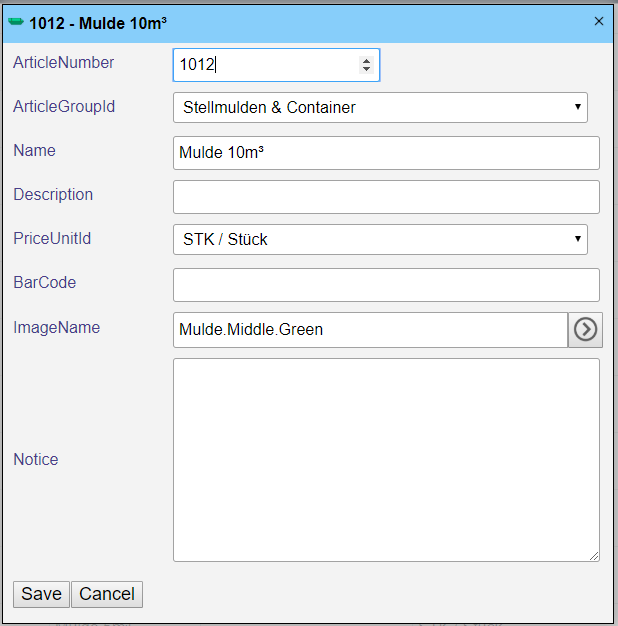
In the article root it is recommanded to assign a logo based on the size of the troughs, so that they can be visually distinguished.
The following logos are predefined in the Wello, each in the colors green, yellow and red:
The name is formed as follows: “Trough.Size.Color”.
| image | Name |
Picture Name Description
|
| Trough. Mini.Green
Trough. Mini.Yellow Trough. Mini.Red | Presentation of the smallest trough | |
| Trough. Small.Green
Trough. Small.Yellow Trough. Small.Red | Presentation of smaller troughs | |
| Trough.Middle.Green
Trough.Middle.Yellow Trough.Middle.Red | Medium-sized hollows | |
| Trough.Big.Green
Trough.Big.Yellow Trough.Big.Red | Larger troughs or containers |
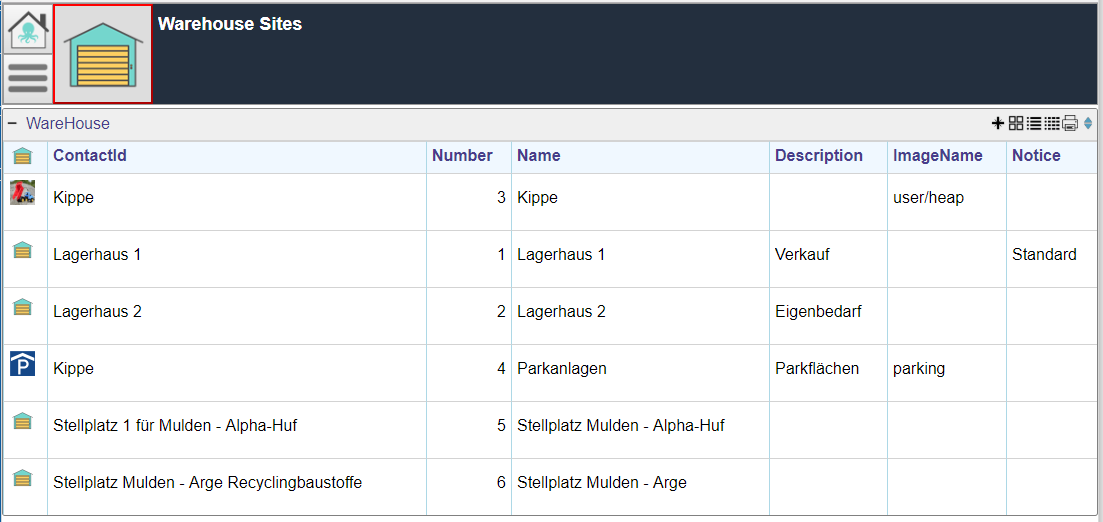
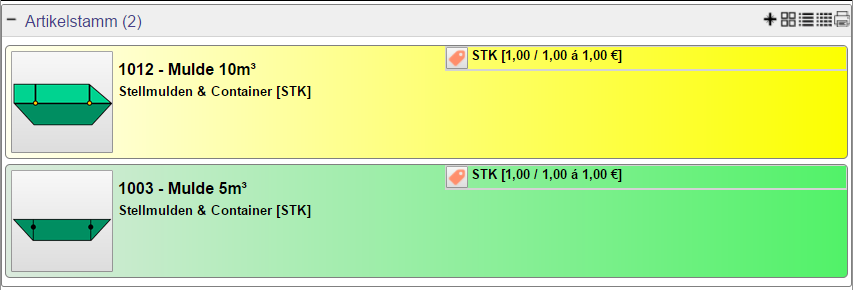
View of an excerpt from the article list with some troughs & containers:
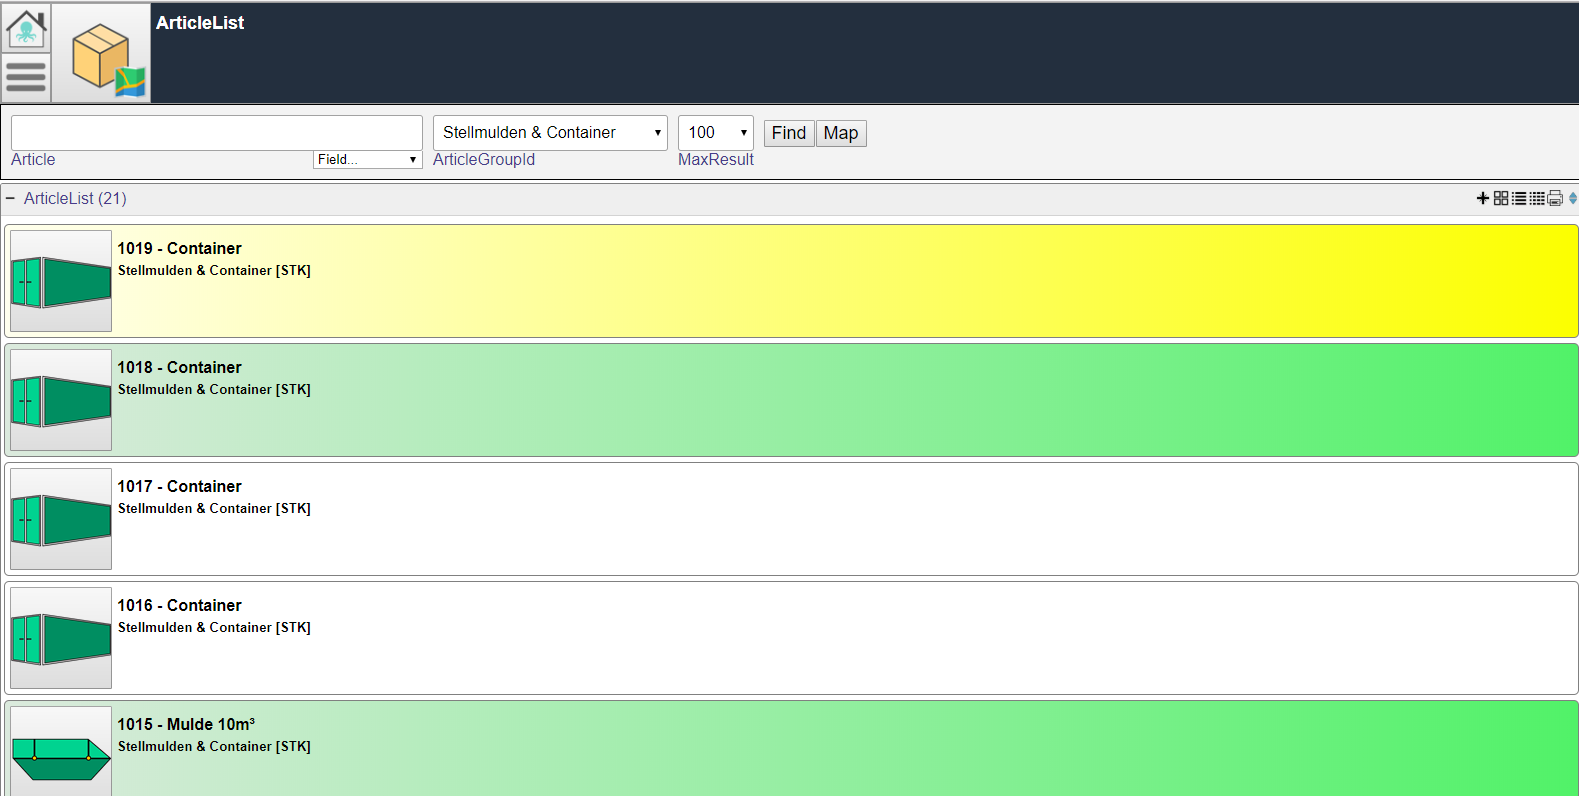
The articles (with GEO data) are shown in the list in the colors “green”, “yellow” or “red” or with a gradient:
| Green | item is available |
| yellow | items in use |
| Red | items not active for a long time. |
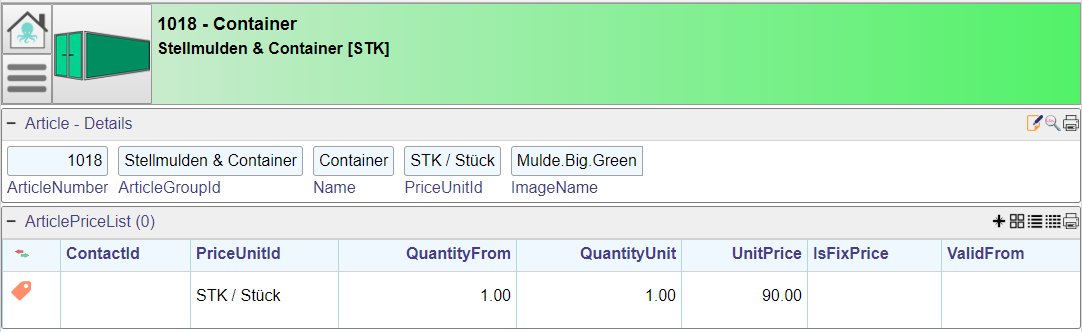
Article Price Lists
It is recommended to enter an entry in the price list of the item for each trough or container. This will be used later in the automatic process to set the units.
Locations
Before starting recording the Trough & Container Inventory, the locations must be registered in the Warehouse Management. These are the places where the available troughs and containers can be parked.
If a trough or container is transported that is not assigned to a location, then the nearest location of the current position in the warehouse management is used and a recording is created.
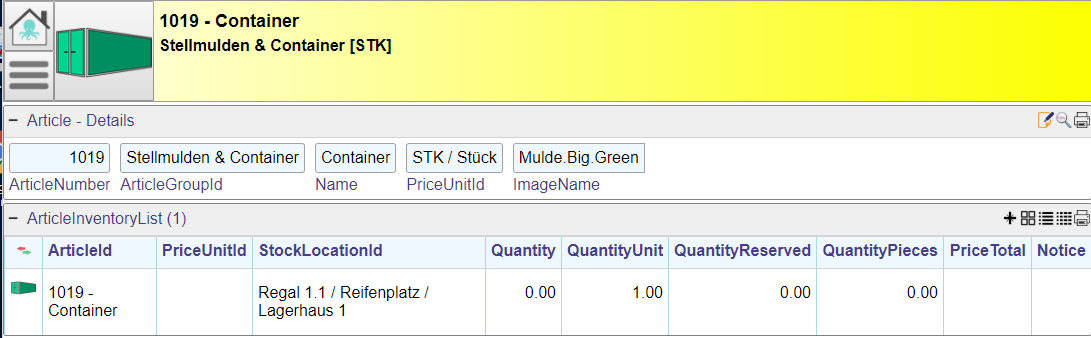
Article Inventory
The troughs & containers inventory, especially if several locations exist, should be included in warehouse management.
If there is no stock inventory for a trough or container availiable, the nearest location will be determined and automatically recorded as inventory.
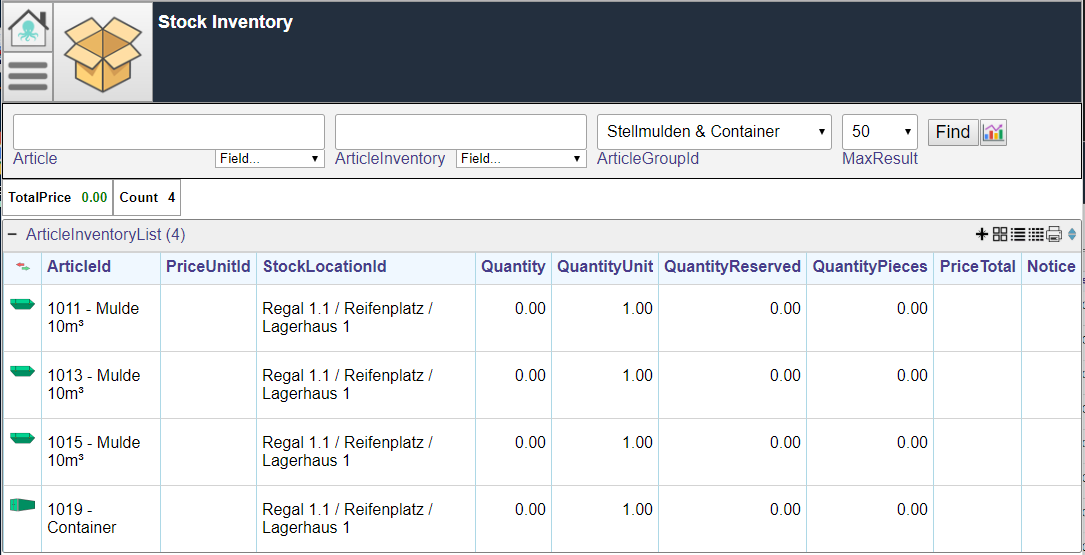
Stock Inventory
The inventory of all troughs & containers can be viewed in the stock inventory. The inventory varies between 0 and 1 because the troughs are in circulation. A “0” means the trough is in circulation and is currently occupied. A “1” meaningfully means that the trough is available.
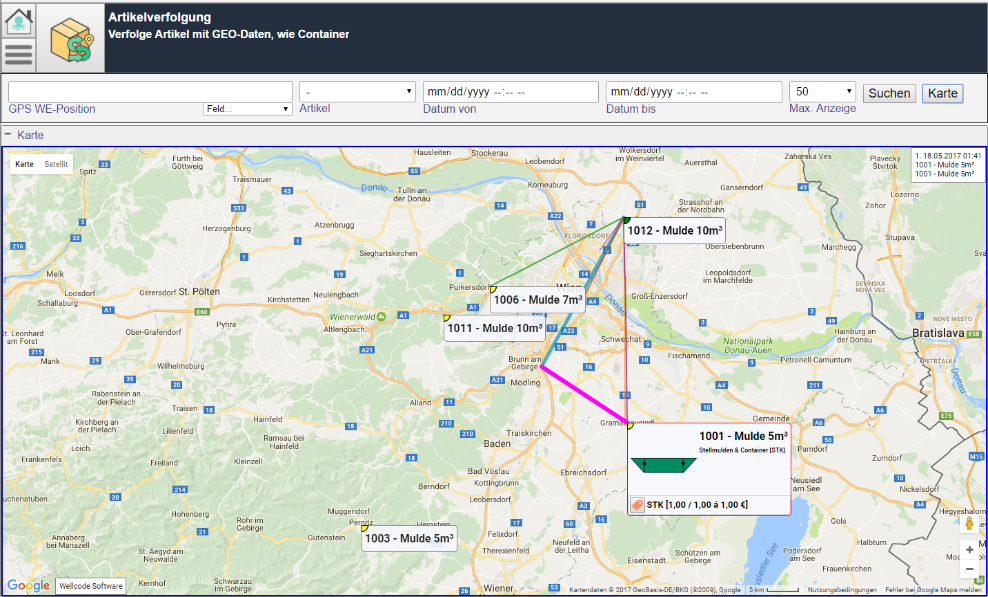
Trough & container positions
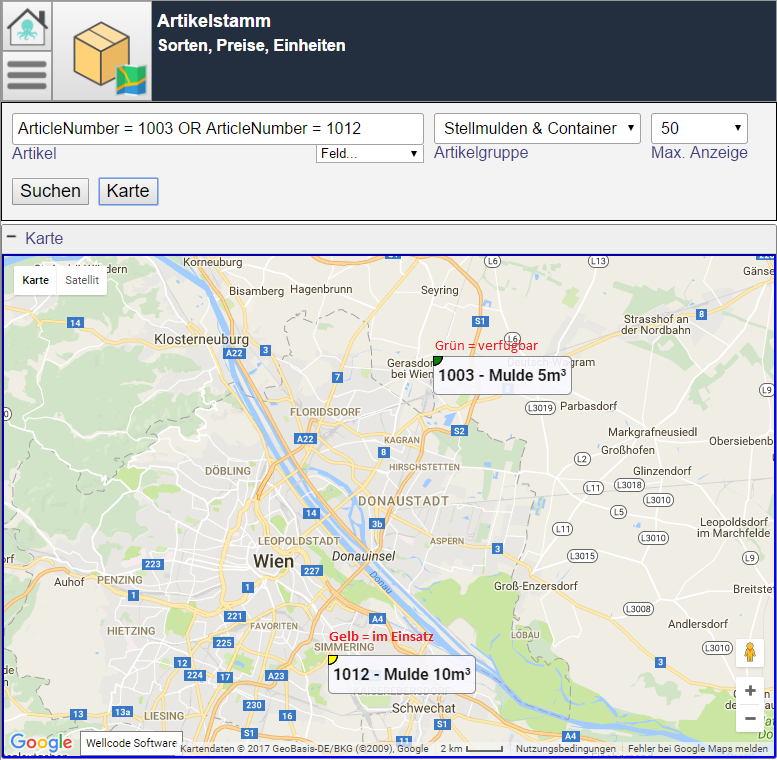
The positions of all articles that have GEO data – here troughs & containers – can be viewed on a world map.
In the article find mask a button named “map” is clickable. After clickingthat button, the positions of the articles from the selection are displayed on a Google Maps© map
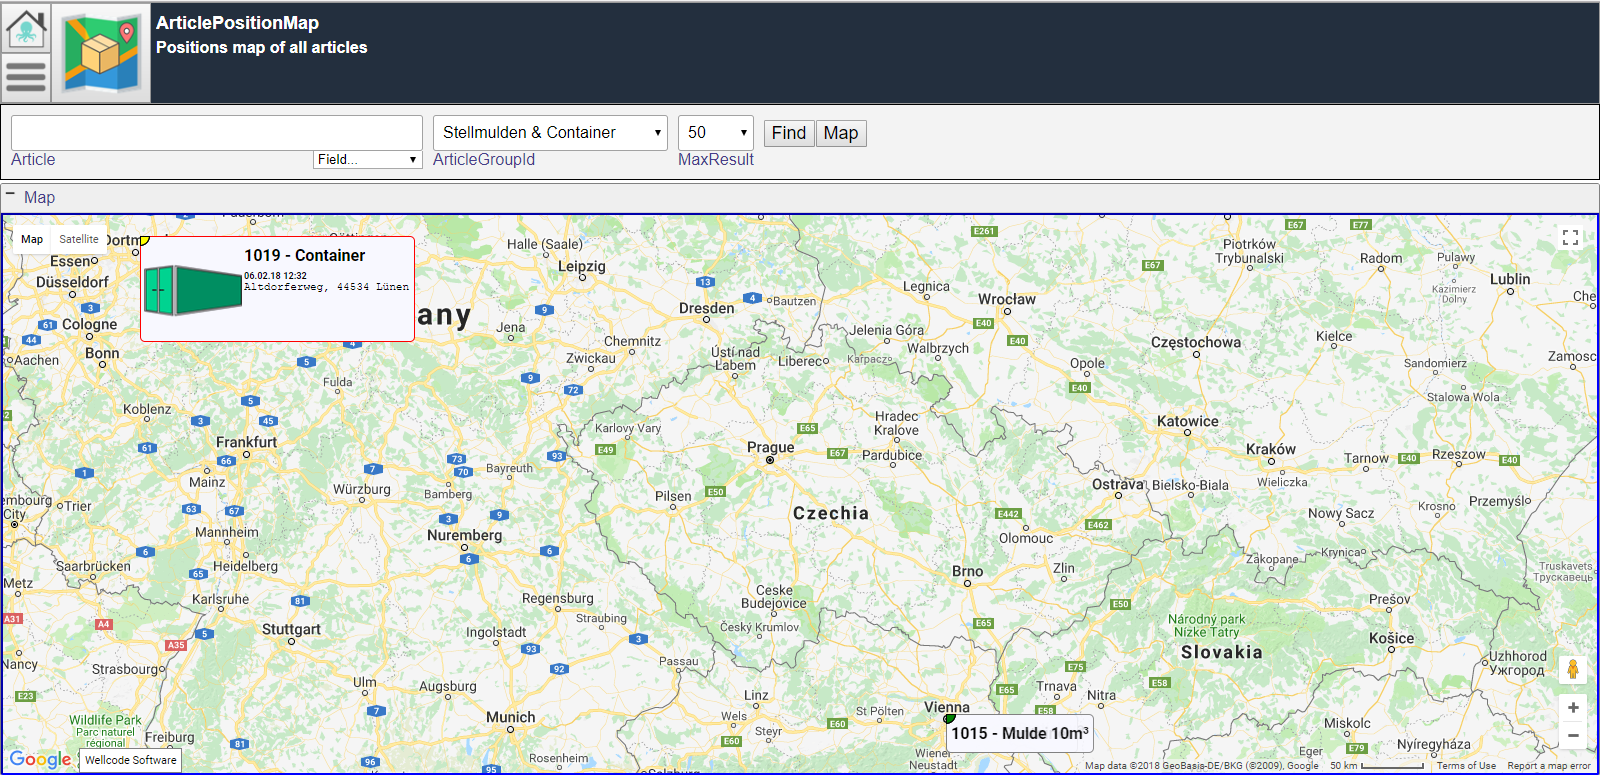
In the view the name of the article with its number are seenable. If you move the mouse to a corresponding entry, further details of the focused entry are displayed.
Trough & Container Tracking
Since the positions of the troughs are recorded both when placing and when picking up, the tracks of the troughs and containers (as in vehicles) can be searched and displayed in the form of a world map or as a list.
Tour
With the activation of container management in the application, the tours get monitored:
- If a tour is detected where a trough or container is to be placed on a construction site, a position named “Delivery” will be added in the tour automatically.
- Similar for “Picking up”, a position “pick up” is included in the tour.
- If the action is “Swap”, two positions are created for picking up and delivery.
Tour Positions
As a rule, the task of a tour in the fields and notes of the tour itself is. However, so that the troughs per tour can be logged, the creation of a tour position is provided.
For example, if the action “trough exchange” is entered in the tour, two positions (automaticaly) are created:
- 1st position for delivering a new trough
- 2nd position to pick up the previous trough by the customer
To each position an article (here trough or container) can be assigned . At this time, however, the troughs are not known, which are transported in the execution of the tour. Therefore, a text “!! Container select !!” is seen in the position.
Which trough, when should be transported, notes the driver (see driver’s view) at the start & end of the tour.
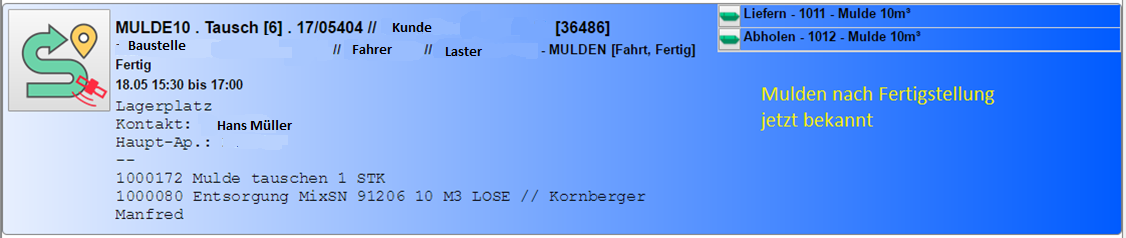
Example of a tour with two positions for trough delivery & Collection:

Example of a “on the move” tour with two positions for troughing & collecting:

Example of a finished tour with two positions for troughs deliver & pick up:
New menu items
| Depending on the tour status, two additional entries appear in the menu of a tour | 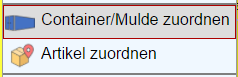 |
- Assign container / trough
When calling this function, the article search with a preselected article group for containers / trough is called. - Assigning articles When called, the article search is called without preselection and any article can be added.
Change / delete / add tour position
Touring positions are automatically generated for known trough movements. These can later be changed, deleted or new ones added.
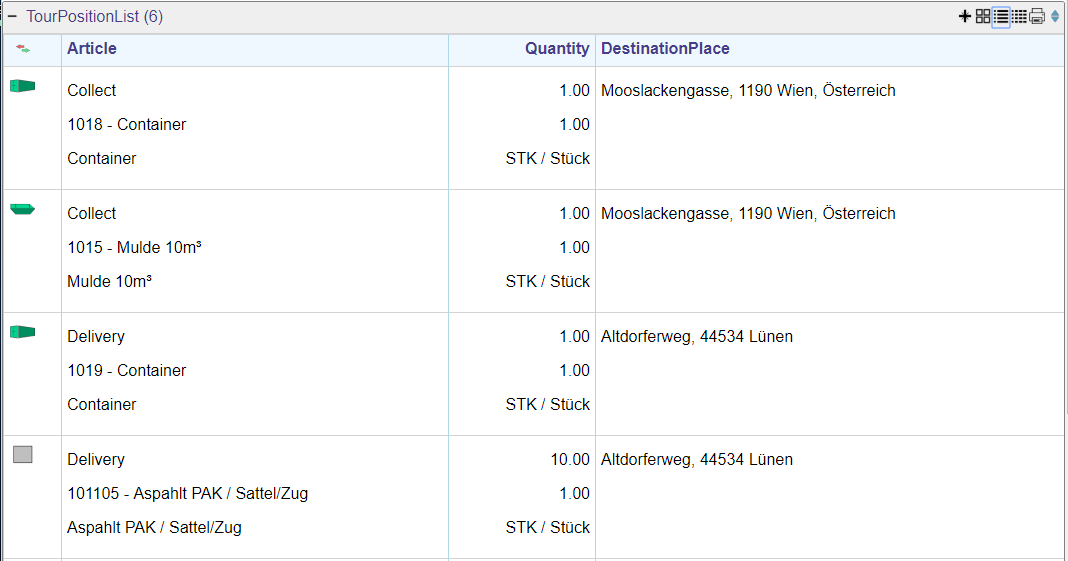
For this you call up the main view of the tour by clicking on the logo. There, all positions in the tour are displayed under “Tour article list”.
The change / delete / add is analogous to the procedure of the rest of the application.
In the destination, the destination address can be changed. There, possible addresses are listed, such as storage locations of the troughs , destination construction site, customer and client address.
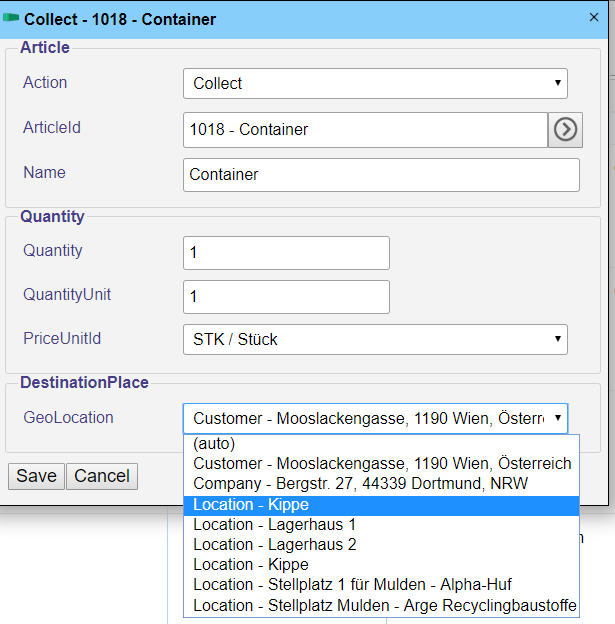
The default value in the destination is the logical value according to the action of the tour position.
driver’s view
The driver’s view has been simplified as much as possible for the driver. The additional functionality is divided into the previous procedure for the tour manipulation.
As already mentioned, the tour generates route positions for container & container transport. The task of the driver is to enter the numbers of the transported skips and containers.
If a driver starts a tour (with the click of the start button), the tour positions for the confirmation and possibly entry of the transported troughs appear in the previous dialog:
- In the individual positions without trough / container two additional buttons for direct entry of the trough appear.
If the driver clicks on the button, the article search with pre-selected article group appears directly.
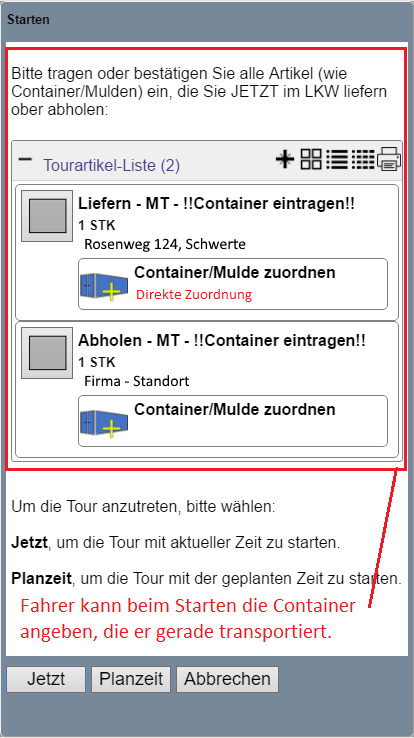
The driver only has to enter the number of the trough and confirm the dialogue.

After selection, the above dialog box appears with the tray selected for the corresponding entry.
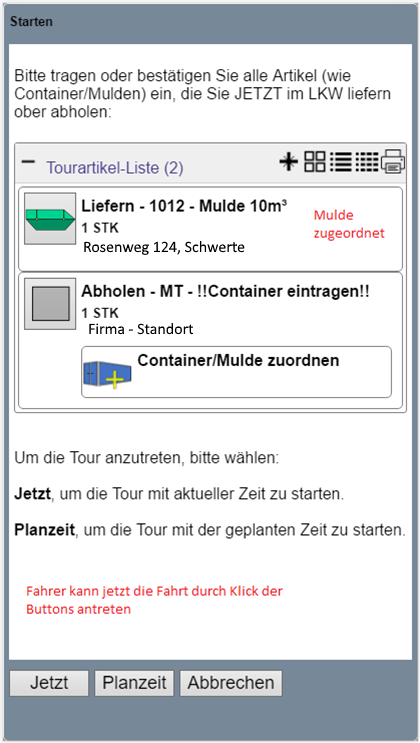
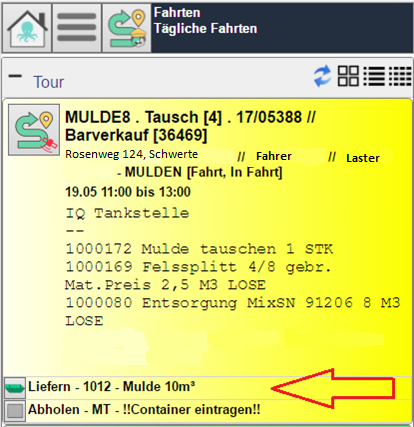
After the start of the journey, the tour will appear with a corresponding entry for the selected trough
However, the driver can also call up the tour positions at any time and subsequently change or even delete them.
If a driver ends the tour, the confirmation dialog appears analogously to the start dialog with the list of tour positions.
Here, the driver, as the start button, proceed.
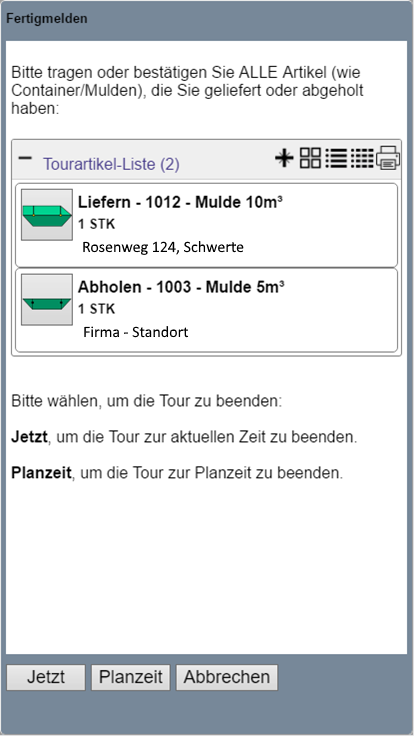
In the tour view, the tour positions can be changed later.
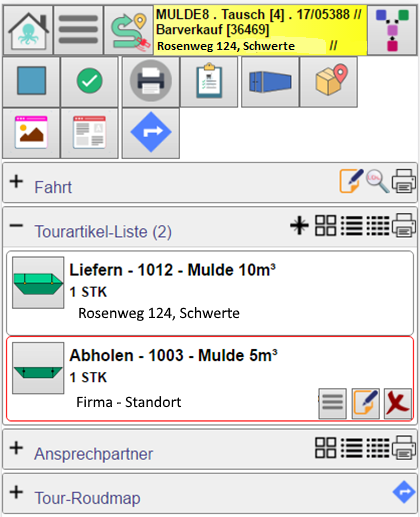
The troughs delivered and picked up here appear yellow on the card for each one, and green on the card for available.
Also in each article listing, the scheduled articles with the corresponding status appear:
Background Processes
Wello Windows Service integrates a service that monitors the tour positions and updates all GEO data of the delivered addresses.